Have you ever been working with a consultant for taxes, loans, other financial services, whatever, and needed to send them a copy of your ID or other sensitive information? How do you get it to them in a way that can’t be intercepted? I hope you didn’t just e-mail it to them. In the past I’ve just uploaded it to Google Drive or Dropbox and given them the link, deleting it once they’ve got it. That’s reasonably secure, since the odds of a bad actor guessing the 32+ character GUID at the end of the URL is pretty slim (although read this for information about using URL shorteners like http://bit.ly). And deleting the file when they’ve confirmed receipt means that if somebody had intercepted the e-mail with the URL they only had a limited time window to grab the file.
But as much as I trust Google and Dropbox (and I do), the fact remains that you’re storing your file on somebody else’s computers. Maybe tomorrow news will come out that somebody discovered a backdoor into Dropbox and has been siphoning off data for 6 months. Like the OPM hack…everyone assumed it was secure, when it had actually been compromised for months while everyone’s information was stolen. Or maybe when you delete a file from Dropbox they hang onto it for a while in case you want to undelete it, or in case the FBI asks for it, and it’s never really gone.
So here’s my new answer: https://owncloud.org/
It’s basically a free, Open Source version of Dropbox. So now you can run the service yourself and have complete control over the data, secure in the knowledge that only the intended recipient accesses your files. At the very least, you have the access logs to say when somebody downloads the file so you know if it’s been compromised.
Now, you could run this yourself from your home computer (or a Raspberry Pi), but that means you have to open up access to your home network from outside. I have an easier solution: https://www.openshift.com/
That’s a cloud container hosting service built by RedHat. One of my last assignments at my last job was evaluating this product for potential use in our department. Now I just use them for little projects like this. What I love is that you can get up to 3 containers (i.e. applications) running for free, and they only charge you for extra features like additional storage, faster processing, or deploying your application in different regions (it’s built on top of AWS). They don’t even ask for a credit card. They manage to keep it free by the fact that if you’re not using your application they acquiesce it (their words) so it doesn’t consume resources. They have thousands of people who sign up for accounts and launch an app, only to abandon it. So those apps are basically put on pause until somebody tries to access them again. That lets RedHat run dozens of containers on a single computer (EC2 node), keeping their costs down to the point they can offer it for free.
To make things even easier, they have a lot of common applications and tech stacks prebuilt for you, including WordPress (which I use for testing Jetpack) and ownCloud (which is obviously where I’m going with this). So here’s a quick walkthrough for getting ownCloud up and running on OpenShift.
I’ll assume that you were so excited when I first mentioned OpenShift three paragraphs ago that you immediately went and created an account. If not, go do that now. There’s a big red “SIGN UP FOR FREE” button at the top right of the page. Once you’ve got an account and logged in, you should see your web application console.
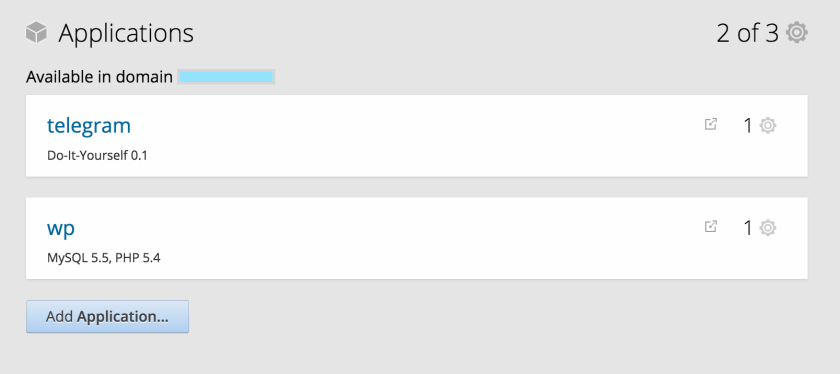
Here’s a screenshot of mine (with my domain blocked out in blue). You can see that I already have two “gears” running (their term for applications). I’ve got a Telegram Bot and a WordPress site. If you’re reading this, you probably don’t have anything here. Go ahead and click Add Application…
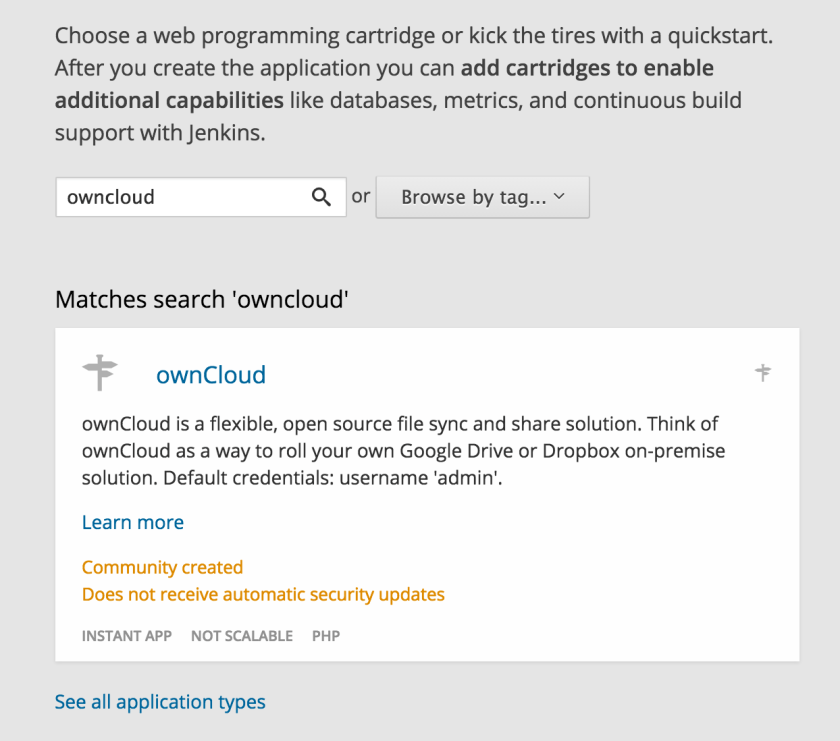
Next you should see a menu with a bunch of pre-defined gears (made up of cartidges…sorry, I’m not the one who made up this naming scheme). Look around to see what’s available, or just search for owncloud and be done with it.
Once you select ownCloud you’ll get a nice set of options for how to configure it. But the only thing you should change is the Public URL. I chose to name mine “share”, but you could call it anything you want, even Cher. Leave everything else as default, and click the Create Application button at the bottom of the page.

Now it’s going to take a few minutes to build, so you can just sit back and relax. You’re waiting for a green screen like you see below.
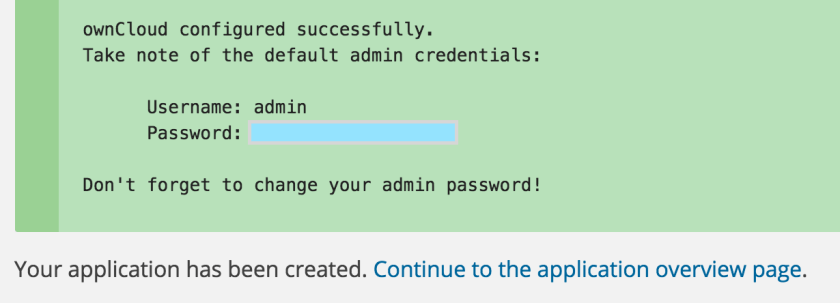
If you see this screen, great! But a word of warning – one time when I did this the operation timed out. The gear was still built and configured, but a quirk of ownCloud is that the default admin password is randomly generated and only displayed on this page. So if you don’t get it here, you’ll have to delete and recreate the application. Luckily this is a rare occurrence, but something to be aware of.
With that in mind, once you see the green screen, be sure to copy down that password. Personally I like to ctrl/cmd-click the Continue to the application overview page link to open in a new tab, so the password is still visible on the old tab.

Now you should be on the overview page, and see something like the above saying that your gear is Started. Click the link (share-XXXXXXX.rhcloud.com) to open your application.

Congratulations! You have your own personal Dropbox. Log in with the username admin and the password you copied down earlier.
From here you’re on your own. OwnCloud has their own tutorials and help documentation on getting the most out of their product.
So now you’ve got a personal cloud storage solution that you can start and stop whenever you need (or just leave running) it, without opening up access to your home network. It has all the features you need, which basically means you can easily upload and share files.
If you want to be extra paranoid about security I have a few remaining tips:
- Always access your site via https, and be sure to use that when sharing links. There may be a way to force that option, but it also might not be possible with the permissions level granted by OpenShift.
- Look into encrypting your files (also read this)
- Delete the application after you’re done using it.
#3 is probably excessively paranoid, but hey, it’s an option. It only takes a few minutes to rebuild the application when you need it again.
So you’re still storing your sensitive files on somebody else’s computer, but at least you have direct access (even via SSH if needed).
